How To Connect Telescope To Computer
In the age of technology, astronomy has also seen significant advancements that go beyond the traditional telescope. One such development is the ability to connect telescopes to computers, opening up a new world of possibilities for both amateur and professional astronomers. This article aims to guide you through the why and how of linking your telescope to a computer, enhancing your stargazing experience in ways you might not have imagined.
Connecting your telescope to a computer not only simplifies the process of locating celestial objects but also offers a range of functionalities that can enrich your observational capabilities. From precise tracking and control to advanced astrophotography techniques, computerized telescopes are revolutionizing the way we explore the universe. Whether you’re an amateur astronomer looking to take your hobby to the next level or a professional in the field seeking to gather more accurate data, integrating your telescope with a computer can offer numerous benefits that we will delve into in this comprehensive guide.
Why Connect Your Telescope to a Computer?
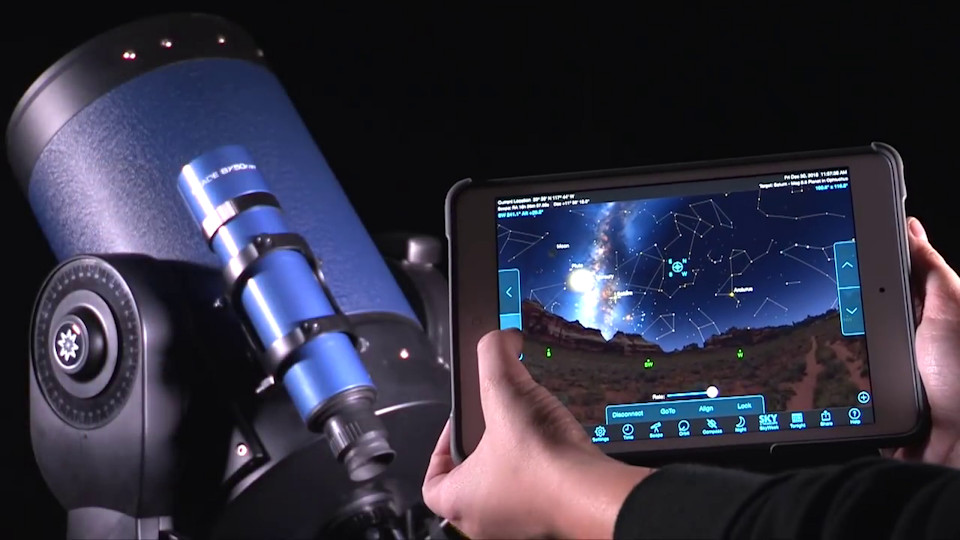
The idea of connecting a telescope to a computer might seem like a complex task reserved for professionals, but the benefits it offers make it a worthwhile endeavor for anyone passionate about astronomy. Here are some compelling reasons why you should consider making this connection:
Enhanced Control
One of the most significant advantages of a computerized telescope is the level of control it offers. With specialized software, you can easily navigate the night sky, pinpoint celestial objects, and even automate your telescope to follow them as they move. This level of precision is particularly beneficial for capturing phenomena that require exact timing, such as eclipses or transits.
Data Storage and Analysis
Connecting your telescope to a computer allows you to store observational data directly on your hard drive. This feature is invaluable for research purposes, as it enables you to analyze your findings over time, compare them with past observations, and even share them with the scientific community. Software can also assist in data interpretation, making it easier to understand complex astronomical events.
Advanced Astrophotography
If you’re interested in astrophotography, a computerized telescope is almost a necessity. The computer can control long-exposure shots, manage filters, and even execute a series of photographs to be stacked later for higher image quality. This level of control is nearly impossible to achieve manually, especially for objects that require long tracking and exposure times.
Real-Time Sharing and Collaboration
With your telescope connected to a computer, you can easily share your observations in real-time with friends, family, or fellow astronomers. Some software even allows for remote control of the telescope, making collaborative research and sky-watching sessions more accessible than ever.
Connecting your telescope to a computer can significantly enhance your astronomical experience, offering you greater control, more robust data storage and analysis capabilities, and opening up the fascinating world of advanced astrophotography.
Types of Telescopes That Can Be Connected
When it comes to connecting a telescope to a computer, not all telescopes are created equal. The type of telescope you have will determine the ease with which you can make the connection and the kind of hardware or software you might need. Here’s a rundown of the different types of telescopes that can be connected to computers:
Computerized Telescopes
These telescopes come with built-in computer controls and often have a USB port for easy connection to a laptop or desktop computer. They are designed to be user-friendly and are usually compatible with a variety of astronomy software. Examples include the Celestron NexStar series and the Meade ETX models.
GoTo Telescopes
While not always equipped with a USB port, GoTo telescopes have motorized mounts and can be controlled via handsets. Many of these handsets have a serial port that can be connected to a computer using a USB-to-Serial adapter. Software can then be used to control the telescope’s movements.
Manual Telescopes with Digital Setting Circles (DSCs)
These are traditional manual telescopes that have been upgraded with digital setting circles, which are electronic devices that help you find celestial objects. While they don’t offer computer control of the telescope, the DSCs can often be connected to a computer to display your telescope’s position in real-time on planetarium software.
DSLR-Ready Telescopes
These telescopes are designed to be compatible with DSLR cameras and often come with a T-ring adapter. While they may not offer direct computer control of the telescope itself, the camera can be controlled via software, allowing for advanced astrophotography techniques.
Telescopes Requiring Additional Hardware
Some older or more basic telescopes may require additional hardware to connect to a computer. This could include motorized mounts, GoTo upgrades, or specialized adapters. Always check the manufacturer’s specifications and compatibility before purchasing additional hardware.
In summary, the ability to connect your telescope to a computer largely depends on the type of telescope you have and its inherent features or the additional hardware you’re willing to invest in. Whether you have a state-of-the-art computerized telescope or a manual one that you’re looking to upgrade, there are options available to bring your stargazing into the digital age.
Hardware Requirements
Connecting your telescope to a computer involves a few essential hardware components. The specific items you’ll need can vary depending on the type of telescope you have and the computer you’re using. Below is a general list of hardware requirements to consider:
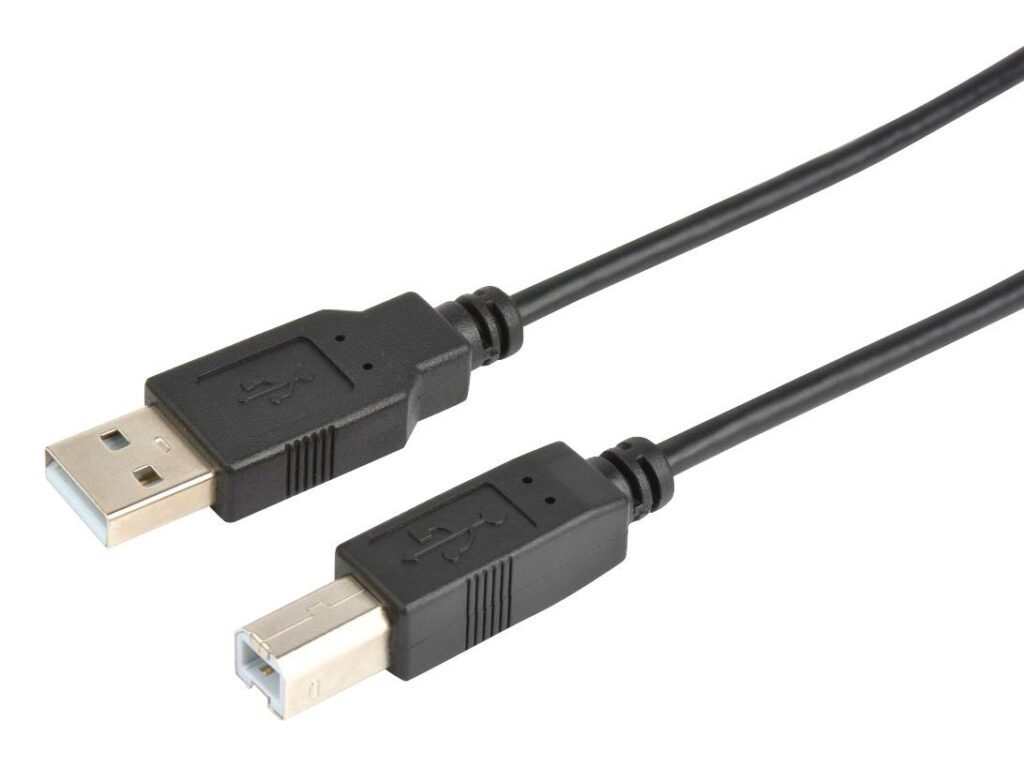
USB Cables
- Type-A to Type-B USB Cable: Commonly used for computerized telescopes with a USB-B port.
- USB-to-Serial Adapter: Required for telescopes with a serial port rather than a USB port.
Adapters
- Serial-to-USB Adapter: For GoTo telescopes with handsets that have a serial port.
- T-Ring Adapter: For telescopes designed for DSLR cameras, allowing the camera to be mounted to the telescope.
Computer Specifications
- Operating System: Check software compatibility; most telescope software is compatible with Windows, macOS, and Linux.
- Processor: A minimum of 1 GHz processor speed is recommended for smooth operation.
- RAM: At least 2 GB of RAM for basic tasks; more may be required for advanced astrophotography or data analysis.
- Hard Drive Space: Ensure you have sufficient storage for software installation and data storage, especially for astrophotography. A minimum of 10 GB is recommended.
- USB Ports: At least one available USB port for the connection; more may be needed for additional peripherals like cameras.
Optional Hardware
- Wi-Fi Adapter: Some modern telescopes offer Wi-Fi connectivity as an alternative to USB cables.
- Power Supply: A portable power source may be needed for extended observing sessions, especially if the telescope and computer are not close to a power outlet.
Before proceeding with the connection, it’s crucial to check the compatibility of these hardware components with both your telescope and computer. Always refer to the manufacturer’s guidelines and specifications to ensure a successful setup.
Software Options
Connecting your telescope to a computer opens up a world of possibilities, thanks in part to the variety of software options available. Whether you’re an amateur astronomer or a seasoned professional, there’s software tailored to your needs. Below, we explore some popular options, both free and paid, that offer a range of features to enhance your stargazing experience.
Stellarium
- Type: Free
- Features: Stellarium is a popular planetarium software that provides real-time sky simulations. It’s excellent for planning observing sessions and can control most computerized telescopes.
- Compatibility: Windows, macOS, Linux
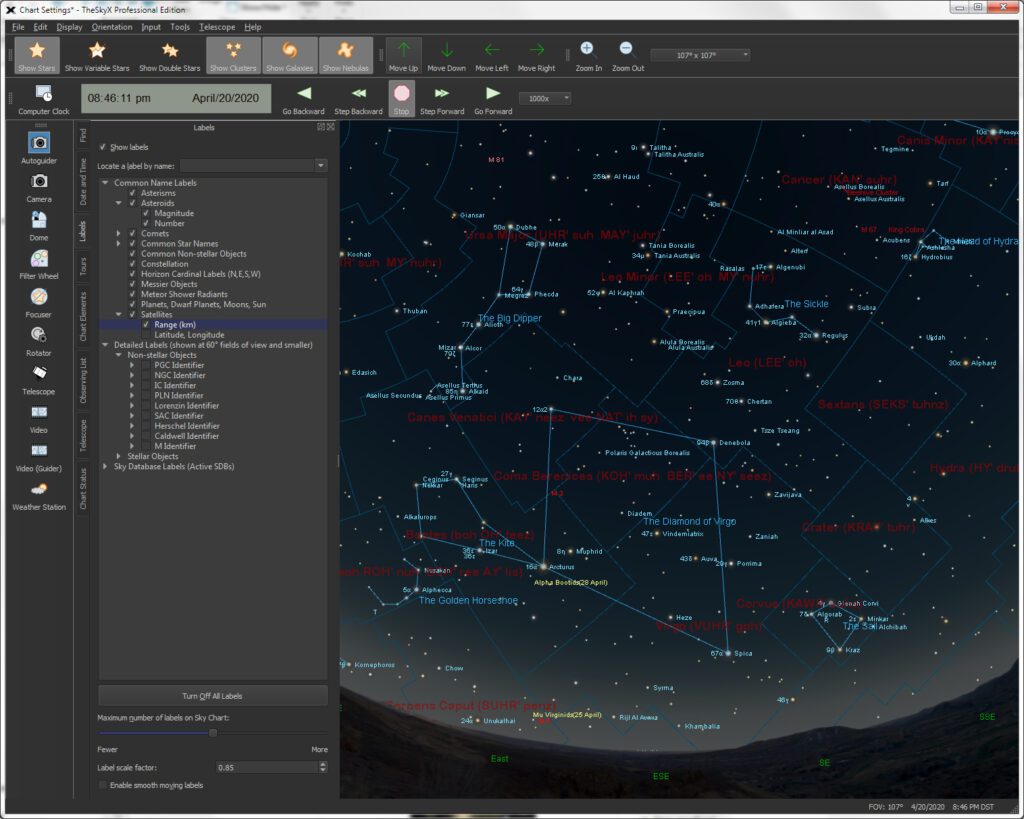
TheSkyX
- Type: Paid
- Features: TheSkyX is a comprehensive tool that offers advanced features like telescope control, camera control, and plate solving. It’s often used by professionals and serious amateurs.
- Compatibility: Windows, macOS
Nebulosity 4
- Type: Paid
- Features: Nebulosity 4 is geared towards astrophotography, offering features like image capture, processing, and stacking. It supports a wide range of cameras and telescopes.
- Compatibility: Windows, macOS
Free vs. Paid Software
- Free Software: Generally offers basic features suitable for beginners or casual observers. Examples include Cartes du Ciel and Celestia.
- Paid Software: Provides advanced functionalities like camera control, image processing, and data analysis. These are more suited for serious astronomers and astrophotographers.
When choosing software, consider your specific needs, the type of telescope you have, and your level of expertise. Free software can be a great starting point, but as you delve deeper into astronomy, you may find the advanced features of paid software to be more beneficial. Always check compatibility with your hardware and operating system before making a decision.
Step-by-Step Guide to Connection
Connecting your telescope to a computer may seem daunting at first, but with the right guidance, it’s a straightforward process. Below is a step-by-step guide that walks you through each stage of the setup, from telescope preparation to software configuration.
Telescope Setup
- Assemble Your Telescope: Make sure your telescope is fully assembled and mounted on its tripod or mount.
- Power Supply: Ensure that the telescope and mount have a stable power supply, either through batteries or an AC adapter.
- Initial Alignment: Perform a basic alignment of your telescope manually, pointing it towards a known star or celestial object.
Software Installation
- Download Software: Choose the software you want to use (e.g., Stellarium, TheSkyX) and download it onto your computer.
- Install Drivers: If your telescope requires specific drivers, install them before launching the software.
- Launch Software: Open the software to make sure it’s installed correctly.
Physical Connection
- Identify Ports: Locate the appropriate ports on both your telescope and computer.
- Connect Cables: Use the necessary USB cables or adapters to connect the telescope to the computer.
- Check Connection: Turn on the telescope and check if the computer recognizes the device.
Software Configuration
- Open Telescope Control: In your chosen software, navigate to the telescope control section.
- Select Telescope Model: Choose your telescope model from the list of supported devices.
- Connect: Click on the ‘Connect’ button to establish a connection between the software and the telescope.
- Test Controls: Use the software to move the telescope and ensure that the connection is stable.
Calibration and Alignment
- Calibrate: Follow the software’s calibration process, which may include focusing and aligning the telescope with specific stars.
- Test Alignment: Once calibrated, point the telescope at a known object to verify the alignment.
- Save Settings: Most software will allow you to save your calibration settings for future sessions.
By following these steps, you’ll be well on your way to enjoying a more controlled and enriched stargazing experience. Whether you’re capturing breathtaking astrophotographs or diving deep into celestial research, a computerized telescope setup can significantly enhance your observations.
Troubleshooting Common Issues
Even with the best of preparations, you may encounter some hiccups while connecting your telescope to a computer. Here are some common issues and their solutions to help you troubleshoot effectively.
Telescope Not Recognized by Computer
- Check Cables: Ensure that all cables are properly connected and not damaged.
- Reinstall Drivers: Sometimes, outdated or corrupt drivers can cause issues. Reinstall the latest drivers for your telescope model.
- Restart Both Devices: Turn off both the telescope and the computer, and then restart to see if the issue is resolved.
Software Not Responding
- Check System Requirements: Make sure your computer meets the minimum system requirements for the software.
- Update Software: Ensure you have the latest version of the software installed.
- Check for Conflicts: Close other programs that might be conflicting with the telescope software.
Calibration Errors
- Realign Telescope: Manually realign your telescope and try the calibration process again.
- Check for Obstructions: Ensure there are no obstructions that could affect the telescope’s alignment.
- Consult User Manual: The user manual often contains specific troubleshooting tips for calibration.
Connection Drops Frequently
- Check Power Supply: Ensure that the telescope and computer have a stable power supply.
- Test on Another Computer: Sometimes the issue might be with the computer’s USB port. Try connecting to a different computer to rule this out.
- Check for Software Updates: Make sure your telescope software is up to date, as patches for connectivity issues are commonly released.
Image Quality Issues in Astrophotography
- Adjust Focus: Ensure that the telescope is properly focused.
- Check Camera Settings: If you’re using a built-in or attached camera, make sure the settings are optimized for astrophotography.
- Clean Optics: Dust or smudges on the telescope’s optics can affect image quality. Clean the optics carefully following the manufacturer’s guidelines.
By addressing these common issues, you’ll be better prepared to enjoy a seamless stargazing experience, enriched by the capabilities that a computerized setup can offer.
Advanced Techniques
Once you’ve mastered the basics of connecting your telescope to a computer, you may want to explore some advanced techniques that can further enhance your astronomical observations and photography. Here are some advanced features you can take advantage of:
Autoguiding
- What is Autoguiding?: Autoguiding is a technique that allows your telescope to automatically correct its alignment in real-time, ensuring that your target remains centered.
- Hardware Requirements: You’ll need a guide scope and a specialized autoguiding camera.
- Software Solutions: Programs like PHD2 Guiding can help you with autoguiding setup.
- Benefits: Ideal for long-exposure astrophotography, as it minimizes star trails and other errors.
Automatic Alignment Support for DSLRs
- Introduction: Many modern telescopes and software support DSLR cameras for automatic alignment, making it easier to capture high-quality images.
- How it Works: The software can control the DSLR settings, including exposure time, ISO, and focus, directly from your computer.
- Compatible Software: Software like BackyardEOS and AstroPhotography Tool offer extensive support for DSLRs.
- Advantages: This feature allows for more precise control over your photography settings, enabling you to capture detailed and well-exposed images.
Remote Observing
- Overview: Some advanced setups allow you to control your telescope remotely via the internet.
- Software Requirements: Software like TeamViewer or AnyDesk can be used for remote access.
- Security Measures: Ensure a secure connection to prevent unauthorized access.
- Use Cases: Ideal for shared telescopes or for observing when you can’t be physically present.
Scripted Observations
- What Are They?: Scripted observations allow you to pre-program a series of targets and actions.
- Software Options: Programs like Sequence Generator Pro allow for complex scripting.
- Benefits: Ideal for capturing time-lapses or for observing multiple targets in one session without manual intervention.
By diving into these advanced techniques, you can unlock the full potential of your computerized telescope setup, making your stargazing sessions more efficient and rewarding.
Structured overview
| Step/Component | Description | Details |
|---|---|---|
| Telescope Compatibility | Check if your telescope is compatible with computer connection | Mostly GoTo or computerized telescopes are compatible |
| Necessary Hardware | List of required hardware components for connection | Cables (USB, RS-232), adapters, etc. |
| Software Selection | Recommended software for telescope control and astrophotography | Planetarium software, image processing software |
| Initial Setup Procedure | Steps to connect the telescope to the computer | Connecting cables, software installation, alignment |
| Calibration and Alignment | Ensuring accurate tracking and control of the telescope | Star alignment, calibration procedures |
| Troubleshooting | Common issues and their solutions | Connectivity problems, software glitches |
| Advanced Observation | Techniques for enhanced astronomical observation | Long exposure astrophotography, remote telescope control |
| FAQs | Answers to frequently asked questions | Tips on hardware compatibility, software updates |
Tips for Astrophotography

Astrophotography is one of the most rewarding aspects of connecting your telescope to a computer. However, capturing those stunning celestial images requires a bit more than just pointing your telescope at the sky. Here are some tips to help you capture high-quality images:
Understanding Exposure Time
- Basics: The exposure time determines how long your camera’s sensor is exposed to light. Longer exposure times can capture more details but may also introduce noise.
- Recommended Times:
- Planets: 1/125 to 1/500 second
- Moon: 1/125 to 1/250 second
- Deep Sky Objects: 30 seconds to several minutes
- Balancing Act: Finding the right exposure time is a balance between capturing enough light and minimizing noise.
ISO Settings
- What is ISO?: ISO controls the sensitivity of your camera’s sensor.
- Recommended ISO:
- Planets and Moon: 100-400
- Deep Sky: 800-3200
- Note: Higher ISO settings can introduce more noise.
Focusing
- Manual vs. Autofocus: While some advanced setups have autofocus, manual focus often gives more precise results.
- Use Live View: Use your software’s live view feature to focus in real-time.
- Zoom In: Zoom into a bright star or planet on your computer screen to fine-tune the focus.
Image Stacking
- What is It?: Image stacking involves taking multiple short-exposure images and combining them to create a single, noise-reduced image.
- Software: Programs like DeepSkyStacker can help you with image stacking.
- Benefits: Reduces noise and brings out more details in the final image.
White Balance
- Auto vs. Manual: While auto white balance can work well for some shots, manual white balance gives you more control.
- Calibration Frames: Use calibration frames like darks and flats to correct for sensor imperfections and uneven field illumination.
Post-Processing
- Software: Use software like Adobe Photoshop or GIMP for post-processing.
- Adjustments: Tweaking brightness, contrast, and saturation can bring out more details in your images.
By following these tips, you can significantly improve the quality of your astrophotography, turning your stargazing sessions into a truly artistic endeavor.
FAQs
What is a computer-controlled telescope?
A computer-controlled telescope is a telescope that can be operated and maneuvered using specialized software on a computer. These telescopes often come with built-in motors and sensors that allow for precise tracking and positioning, enabling users to easily locate and observe celestial objects.
Why should I connect my telescope to a computer?
Connecting your telescope to a computer offers several advantages:
- Enhanced Control: Software can provide more precise control over your telescope’s movements.
- Data Storage: You can save your observations and images directly to your computer.
- Astrophotography: It makes capturing long-exposure images easier.
- Automated Tracking: Many software options offer automated tracking of celestial objects.
- Ease of Use: Software interfaces are often more user-friendly than manual controls, especially for beginners.
What cables or adapters do I need?
The type of cables or adapters you’ll need depends on your telescope and computer setup. Here are some common options:
- USB Cable: Most modern telescopes come with a USB port for easy connection.
- RS-232 Cable: Older telescopes might require an RS-232 cable, along with a USB-to-RS-232 adapter for modern computers.
- Wi-Fi Adapter: Some telescopes can connect via Wi-Fi, requiring a compatible Wi-Fi adapter.
- Power Supply: Ensure you have a stable power supply, especially for longer observation sessions.
How do I choose the right software?
The choice of software depends on your needs, the type of telescope you have, and your level of expertise. Free software like Stellarium is great for beginners, while more advanced software like TheSkyX offers additional features for serious astronomers.
Can I use my smartphone instead of a computer?
Yes, some telescopes and software are compatible with smartphones. However, the smaller screen and limited processing power may restrict some functionalities.
Is it difficult to set up?
The difficulty of the setup varies depending on the telescope and software you’re using. However, most modern setups are designed to be user-friendly, and many come with step-by-step guides.
Do I need an internet connection?
An internet connection is generally not required for basic telescope control but may be necessary for software updates or accessing online star databases.
What are the system requirements for the software?
System requirements vary by software but generally, a modern computer with Windows or macOS and a decent amount of RAM should suffice for most applications.
How can I improve my astrophotography?
Improving astrophotography involves a combination of the right equipment, software, and techniques. Using a stable mount, long-exposure settings, and image stacking can significantly enhance the quality of your photos.
Conclusion
In today’s digital age, the fusion of technology and astronomy has opened up new vistas for celestial exploration. Connecting your telescope to a computer not only simplifies the process of stargazing but also amplifies the capabilities of your telescope. Whether you are an amateur astronomer looking to dip your toes into astrophotography or a seasoned professional aiming for precise data collection, a computerized setup offers a range of benefits that are hard to ignore.
From enhanced control and automated tracking to data storage and high-quality imaging, the advantages are manifold. With the right hardware and software, you can transform your stargazing experience into a more interactive, educational, and fulfilling endeavor. So, don’t hesitate to take this technological leap; the universe is waiting for you to explore it in all its glory.
By embracing the power of computerized telescopes, you’re not just looking at the stars; you’re engaging with them in a way that was once the stuff of science fiction. It’s an exciting time to be a stargazer, and the sky is not the limit—it’s just the beginning.
Additional Resources
For those who are keen to explore further, there are a plethora of resources available to guide you through the intricacies of connecting your telescope to a computer. Whether you’re looking for step-by-step tutorials, software recommendations, or hardware reviews, the following resources can provide valuable insights:
Tutorials and Guides
- Cloudy Nights Forum: A community-driven platform where you can find various threads discussing telescope-computer setups.
- YouTube: Channels like “Fraser’s Astronomy” and “AstroBackyard” offer detailed video tutorials on the subject.
Software Recommendations
- Stellarium: A popular, user-friendly, and free planetarium software.
- TheSkyX: Offers advanced features for professional astronomers but comes at a premium price.
- Nebulosity 4: Ideal for astrophotography and image processing.
Hardware Recommendations
- USB to Serial Adapters: Brands like Sabrent and UGREEN offer reliable adapters.
- Telescope Mounts: Look for mounts with built-in computerized systems, such as those from Celestron or Orion.
- DSLR Adapters: For those interested in astrophotography, T-ring adapters can be useful.
Online Communities and Forums
- Reddit’s r/telescopes: A great place to ask questions and share your experiences.
- Stargazers Lounge: An online forum dedicated to all things astronomy.
Books and Magazines
- “NightWatch: A Practical Guide to Viewing the Universe” by Terence Dickinson: A comprehensive guide for beginners.
- Sky & Telescope Magazine: Offers articles, tips, and product reviews.
By leveraging these resources, you can gain a more in-depth understanding of the subject, making your journey into the world of computerized telescopes both enjoyable and educational.
